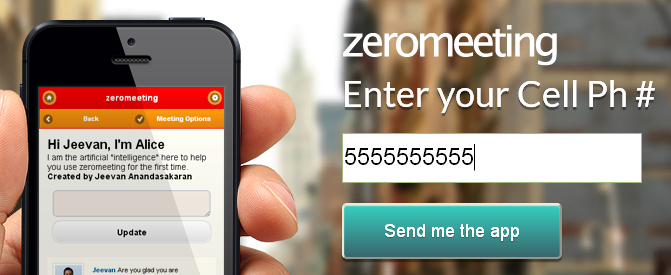
When your customers are away from their computers, there is no better way to reach them than on their mobile phones. Now with Voice and SMS services from Twilio, it’s possible for anyone to build an advanced phone system at a price anyone can afford. Telephone numbers in the Twilio cloud are just $1.00 USD per month, and SMS text messages are just one cent per message.
Note that the live demo only sends it to my personal number as trial account are for testing purposes only. So if you try to enter your own number, it will give you an error and explain the reason. However, if you give me your number and once verified through the Twilio dashboard, you can begin to receive the test SMS too.
For a developer there are a myriad of ways to take advantage of this API, from upgrading your applications security by sending a new password to a user’s phone, to having users place a call to sales right from your website or sending customers right to the app store, Google play or mobile app just by entering their phone number. To show you how easy it is, we will take the last example and demonstrate how to be up and running in minutes.
In this case I have a mobile web app I’d like to deliver via my website. All I want is for a user to enter their ten digit phone number and have them receive a text with the link to my mobile app.
The first thing you need to do is get a free account at https://www.twilio.com . Once logged in, you will see your account SID, and AUTH TOKEN at the top of the page. Your AUTH TOKEN is hidden until you click on it. You will need both of these to place a request to Twilio as well as purchase a phone number to send from. You can do this any time you are ready to go live. Twilio will ask you to put $30 down to cover SMS charges.
For this app we will be using PHP. Twilio has helper libraries for PHP, Ruby, Python, Net, Java, Salesforce, node.js, C++, Scala, Perl, Erlang, ColdFusion, LiveCycle and Mule ESB.
The PHP helper library, twilio.php can be downloaded from Git here.
https://github.com/twilio/twilio-php/zipball/latest
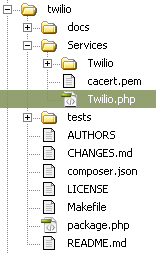
Unzip the file and place it on your web server. In my case I’ve renamed the folder to “twilio” and placed it in the root of my website. You can place it anywhere; you will just need to include the Twilio.php file for your request to work.
For this tutorial, we will create the whole process in one PHP page which includes a simple form, with the action directed to the same page.
The Form
<form action="<?=$_SERVER['PHP_SELF']?>" method="post" id="myForm" name="myForm">
<input type="text" name="phone" id="phone" value="<?=$_POST['phone']?>" >
<br>
<input id="sendLink" name="sendLink" type="submit" style="margin:20px 0 0 0;" class="button" value="Send me the app">
</form>
The form contains only one text field (“phone”) and one button (“sendLink”). Once the submit button is pressed, the variable within phone will be passed to the same page using a POST request.
The PHP Code
To validate the phone number and get rid of any unwanted numbers we will need to create a validation function for a phone number that will return just the numbers in the string that was posted in the “phone “ text field. Here is the function I used:
function validatePhone($string) {
    $numbersOnly = ereg_replace("[^0-9]", "", $string);
    $numberOfDigits = strlen($numbersOnly);
   if($numberOfDigits > 10) {
return '+'.$numbersOnly;
} else {
return $numbersOnly;
}
}
This function replaces any character that is not a number 0-9 with nothing. Then we do a check to see if the number of digits equals 10. This function will be called in the following code.
Next we will create a simple check using an “if” statement for the $_POST[‘sendLink’] variable. If the variable exists, we move on to validation.
The first thing we do is check to see if the $_POST[‘phone’] variable is populated. If it is not, we will populate an error variable we can use later to display a message to the screen. In this case we will populate it with “you must enter a phone number”
If the phone number exists, we can validate it by using the function we created earlier. If it’s invalid, we will populate the error message, telling the user they must enter a 10 digit phone number.
Here is what the code so far looks like:
if($_POST['sendLink']) {
	if(!$_POST['phone']) {
			$feedback ='You must enter a phone number';
	} else {
		$phone=validatePhone($_POST['phone']);
		if($phone) {
			  // $phone is valid
		} else {
			$feedback='You must enter a valid 10 digit phone number';
		}
	}
// more code goes here
}
Before we move on to sending the text we will check to see if anything is inside the error variable. If there are no errors we will continue to send the text message using Twilio.
Sending a text using Twilio
To send a text, you will first need to include the Twilio.php file or have that included within your include path. You will then need to create a new instance of the class Services_Twilio(). To do this you will need to pass to it your SID and AUTH TOKEN you received when you created your Twilio Account. This code is taken right from the Twilio examples that came with the helper library.
This is done like so:
// This line loads the library
require('twilio/Services/Twilio.php');
$sid = "YOUR SID";
$token = "YOUR AUTH TOKEN";
$client = new Services_Twilio($sid, $token);
Now to send the message you will need your purchased Twilio number and the text message you would like to send, along with the posted phone number that you can send the message to.
$message = $client->account->sms_messages->create(
	'YOUR TWILIO NUMBER', // From a valid Twilio number
	$phone, // Text this number
	"Go to my app, http://zeromeeting.com/m; //  Send this content
);

if($message->sid) {
	$feedback='We have sent you a text.';
} else {
	$feedback='Error, something went wrong.';
}
Once a request is made, Twilio will populate a SID identifier for the transaction. By checking for the SID, you can determine whether or not it was successful. At this point the message has been sent and your app is being viewed by a happy user.
User Feedback
For this example the user feedback is going to be simple. We are going to change the title of the form to the contents of the variable $feedback.
<?php  if(!$feedback) {  ?>
	<h1>Enter your Cell Ph #</h1>
  <?php  } else {  ?>
              <h1><?=$feedback?></h1>
    <?php  }  ?>
Recap
And it’s really that simple. I’ve included a sample file of this tutorial that will work out of the box once you add your SID and AUTH TOKEN. I hope to follow this article up in a series where we will show you how to start making calls and responding to texts from your application, not just sending them.
About Ali Gajani
Hi. I am Ali Gajani. I started Mr. Geek in early 2012 as a result of my growing enthusiasm and passion for technology. I love sharing my knowledge and helping out the community by creating useful, engaging and compelling content. If you want to write for Mr. Geek, just PM me on my Facebook profile.


